The focus of the restoration was originally the deck which leaked visibly and there was also that smell, you know the one; the deck was constructed from 18mm teak bonded on to 10mm ply and all through fastened to the beams with No12 bronze screws. A plug cutter was used to expose the screws so that they could be unscrewed to prevent damage to the beams
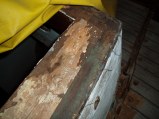
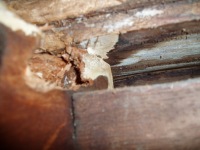
The cause of the damage was the use of traditionally caulked teak, laid on ply, using a synthetic rubber on cotton in the traditional V shaped groove; it was probably difficult to see where it had failed, and where it separated from the teak it allowed water to penetrate to the ply, especially along the joins and edges, where it did most damage to the covering board, and carlins. This in turn caused some beam ends to rot.
With the cabin top removed, which was Cascover sheathed 20mmply, it could be seen that the upper carlin and some beam ends were damaged, this time due to the edge trim protecting the edge of the sheathing failing allowing water penetration of the end grain of the ply and then the beams.
Unfortunately it was also realised that the repairs to the shakes in the solid iroko coachroof sides and at the deck, meant that another decision was needed; very expensive repairs or the replacement of the whole coachroof. I did not need much persuading as I did not like the height of the ‘doghouse’ which stepped down from 6ft10ins headroom to 6ft5ins which is enough for most people. In addition I did not like MG’s companionway offset to starboard, based on the concept of ‘laying to’ in heavy weather on the starboard tack, putting the companionway up top rather than my preferred compromise of a central companionway, regardless of which tack.
So that was it; strip all down to deck level and start again. This meant that the new deck would have to be laid after the coach roof had been rebuilt, which also meant redesigning around the position of the deck stepped mast base, to ensure it remained in exactly the same vertical position
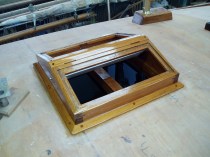
and the new central companionway. We took the opportunity to design Thames pattern portholes with laminated glass to be let into the 25mm thich sides, on rubber seals and clamped in place by bronze surrounds.
MAST Meanwhile I stripped the mast and boom completely. They had been painted with bronze Hammerite (smooth) originally, (alpresumably to emulate the gold anodised aluminium masts of the 60s, and then with several more coats of other white paint over the years.
They were in remarkably good condition thanks to the Hammerite, not usually recognised for its qualities on wood, but actually excellent on wood due to its tough flexible characteristics.
Unfortunately, at some point when a rewire was needed, it was discovered that it was impossible to extract the old wiring and insert new inside the mast, so a conduit of a type designed for radar cables, had been screwed all the way up beside the main sail track,
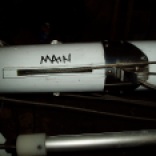
Conduit for wiring It was an ugly thing and having rejected the cost of a new but white painted aluminium mast, I decided to insert a conduit up the hollow centre of the mast; this required machining out the solid sections, at the base, the hounds and the top section, pushing the conduit up in connecting sections, and new pieces of douglas fir scarfed and epoxy bonded in on top. The outlets for the wiring for steaming, decklights and VHF, were made and lines let in for pulling the cables.
One or two seams that opened when I stripped back to bare wood (seemed a good idea at the time but a lesson learnt) were also glued and clamped at the same time. It spoke a lot for the quality of Brian Kelly’s workmanship, that 95% of all the joints remained intact. (He built the 45ft mast in a village hall).
3 coats of 2pack epoxy primer/filler, rubbed down, and 3 coats of 2pack Polyurethane Blakes (yes, then) Pearl White, and we were ready for the refit. The boom had also been modified to remove the original footrope groove, already replaced by track on the other side. As I was not intending to used the roller reefing, the wedges and reefing beeblocks were also removed, leaving a clean round boom, with the flat for the aluminium track.
The aluminium mast and boom tracks were halved to 6ft, so they would fit in a PU powder coating stoving oven, and sprayed with matching pearl white PU. The galvanised mast band with spreader sockets, and mast cap, were primed and painted 2pack PU with the mast.
RUNNING RIGGING The wire halyards were run in aluminium tubes to prevent frapping damage, down to two large bronze wire winches, with enormous handles held permanently in place by clutches, so that when not in use they could be dropped down and the handle pushed inboard. I am averse to wire and decided to replace all running rigging with synthetic, except that I found no alternative to the 6inch bronze main masthead sheave in a tufnol box, designed for 6mm wire; this would be remain by using 6m Dyneema from the sheave to the boom, with 10mm braid tail, down to normal winches, actually another story.
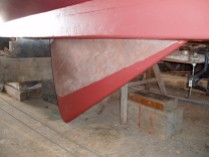
CENTREBOARD The hull was jacked up to allow the board to be dropped enough to allow most of it to be exposed but it was not possible to raise enough to fully extract it. The pivot pin, a 40mm stainless shaft, with nuts embedded either side of the lead keel, sealed in with hardened putty, which had to be carefully drilled and chiselled out. Then how to extract the nuts; where to find 2 sockets that size without expending a fortune. Turned out that special sockets are made for 65mm Ford hub nuts, so off it came, and the board dropped down. The shaft runs freely through plain bronze flanged bushes either side of the board as bearings but a tight fit through the lead keel with a reinforcing bush on the inside faces of the keel to ensure that the board moves around the shaft.
The Pitch Pine had been worn away in grooves, so I cleaned all the remaining paint and antifoul, feathered the trailing edge and faired it all with epoxy filler and sheathed it with epoxy/glass cloth. I happened to have some Coppercoat left over from my previous project, enough to give it a good coating, on the basis that it would not be dropped for a while and that would give it some antifoul properties. The leading edge was protected by a bronze band, which to maintain the continuity of the glass sheathing, I ended up covering over. Not ideal as it could be hit and split the glass, possibly pealing it away.
The inside of the casing was scraped back to a bitumen looking coating which was left, primed and heavily copper antifouled. The slot in the lead keel has a bronze edge, so to reduce lateral movement of the board, I screwed quarter round copper strip at an angle across the board either side to act as a scraper against the bronze edge. (Not shown in the pics).
COACHROOF AND DECK Meanwhile work had started on the deck and coach sides so the roof beams could be installed. The deck was specified as 2 layers of 12mm and 1 layer 0f 8mm, all Robbins Elite, giving 32mm plus the thickness of 2 layers of epoxy glass sheathing finished with PeelPly. The first layer cut square and butted on the beams, glued and gripfast nailed to the beams. Each successive layer was cut to lay diagonally in 2ft wide strips so that there was virtually no wastage.
The coachroof was laid with perfect knot free T&G Douglas fir, 18mm, in single lengths, machined with grooves only, and the tongues cut from 6mm ply to accommodate the stress from bending over the camber (it is also significantly reduces the wastage from machining tongues), all glued and anchorfast nailed to the beams. This was covered with the 8mm ply giving a total of 26mm, plus the 2 layers of epoxy glass sheathing.
The cockpit was reconstructed with coamings lent out to make them more comfortable for those with smaller frames than the original tall owner. The originals had been extensions of the coachroof sides which lent in, normal for this type of boat and more economic to make. The bronze winch supports were modified, and the afterdeck was reduced by extending the cockpit with a large lift off hatch accessing the lazarette, only accessible before by a small hatch at the aft end of the cockpit, now replaced by a small Houdini hatch recycled from the main bulkhead over the galley; by coincidence a perfect fit.
The Bulwarks had been supported traditionally by the extended oak frames, and were rotten as usual where they came through the deck; they were cut off flush with the top plank, which was also replaced on the port side. Their replacements were an interesting construction. Stainless steel strip, 50mm by 100, bent to the curve of the hull, were let in on top of the beam shelf. They were tapped so that threaded rod could be screwed down into them through the new deck mounted bulwarks, then flushed off and sealed with epoxy.
RUDDER
The original rudder was designed with a trim tab added, which was removed at some point after Brian Kelley sold her; it can just be seen in the photos in the 1987 sales leaflet. The rudder was a traditional semi balanced design; round trailing edge with no taper. I had experienced quite a heavy helm, especially with the prop walk under engine. and suspected that the rudder was both too large and inefficient, especially with drag. I decided to reinstate a trim tab, and modify the design with integral tab.
I took advice about the shape of the rudder and trim tab from Nick Franklin of Aries Vane Gear, whom I knew, and he confirmed the need to straighten the trailing edge, and not to be afraid of a tab big enough to be used for direct steerage, and ensure that it was a good hydrofoil section.
So the first job was to square it off to a straight trailing edge and then cut out the section to become the trim tab. I decided to use a tab section that was deep enough to steer the boat with a tiller pilot, on its own in relatively calm weather, with the tiller locked, as Nick had suggested. Then it could also be used a a real trim tab, with the tiller pilot in reverse.

I took my cue for the angle of the tab from what I took to be the remains of the original tab, two bronze strips that appeared to serve no other purpose. I also wanted the shaft to end up at the top of the stock in a recess that housed the original.
I patterned the gudgeon and had 4 cast in bronze. These were machined for a 1inch bronze shaft machined to drive the top gudgeon, locked by a stainless Spirol pin. They were let into the tab and the rudder and bolted in with coach bolts so that the whole assembly could be removed at some point; I accepted that the nuts would be proud.
The shaft could not quite line up as I wanted so had to source a universal joint for 1inch shafts. I quickly discovered that was going to be a major cost until a local boatbuilder said, hang on a minute, I think I might have something like that I rescued from the scrap metal skip. I could not believe my luck; a bronze universal joint for 1inch shafts. All I had to do was swap the rusty circlips on the ends of the bearings for stainless. I still wonder what it came off originally…
I made stainless brackets to hold the stainless main shaft to the stock, from fittings I recycled, and fitted IGUBAL synthetic ball joints which made alignment easy. The yoke was attached by machining a stainless gear lever vibration damper from an old Yanmar engine that blew up on a friends boat. This will be driven by bowden cables attached to the arm of a Simrad T32 tillerpilot, clamped to the inside of the transom. Pictures of the whole arrangement to follow.
The rudder originally hung from a mild steel ball race bearing at the top, but as it had not had regular pressure greasing, it was seized and had to be removed without the benefit of the special tool, the hard way. I turned Acetal (Delrin) thick bearing washers for the gudgeons to sit on. Much simpler.
Curiously, I discovered later that Nick Gates the boatbuilder at Emsworth, had installed a similar arrangement on his restored Zulu/Fifie, Ocean Pearl. He graciously sent me photos of his arrangement,, which use a drive arm attached to the tiller and remote electronics. Look at his videos of sailing Ocean Pearl; he is a very successful racer…
FINISHING
I decided that it would be more appropriate to use a longlasting finish for most of the woodwork, rather than the classic bright varnish. However, I sealed all the bare iroko with 2 coats of a very low viscosity PU based wood primer that sinks right in and provides a ‘permanent’ base for any varnish finish. I had learnt that was how Spirit Yachts primeded their acres of high gloss varnish, without committing owners to forever rubbing down and replacing old degraded varnish.
That did not quite work out, possibly due to some of the iroko being too oily, and subsequently I have had to revarnish all using International Woodskin, that if properly applied looks good and lasts well, even where it is abraded, but, importantly, is easily cleaned and refreshed.. The Cockpit coamings and companionway have been finished with Ravilak to give the cockpit a more classic and bright feel especially where people sit and touch the finish.
All plywood, bulkhead, cockpit coamings, and cabin sides, were painted with 2 coats Epoxy 2pack primer and 3 coats Blakes Pearl 2pack PU. Also the inner transom that had not not looked right in varnish.
The deck was painted in International Sand deck paint and the hull with Hempel Yacht paint Biscay Blue, all colours soon discontinued, much to my annoyance. The bases of the bulwark pillars were filleted with Sikaflex PU caulking, to prevent water from lying around the bases, the common cause of the rot of the original oak frames where they come through the deck; I admit to having an obsession about not creating places where water could be trapped; that resulted in some debates about changing traditional ways of making certain features.
The whale tail scuppers were positioned behind stanchion bases so that water and accumulated dirt could not be trapped; that also reinforced that section of the toe rail.
The cockpit sole and engine cover were painted with Brantho Korux, a polyester paint that is extremely hardwearing but flexible; originally developed for coating steel railway wagons, but can be used on anything and sticks like the proverbial…


